‘Twas the month before Christmas, when all through the office, not a creature was stirring, only the cry from Marketing for a Mendix boffin. With the pressures of Q4, we listened to their cries, then thought, “hey, let’s give it a try!”
Their wish was for an IoT Christmas app that would light up a child’s life. We created an app that would allow users to turn on the lights on a Christmas tree in the Mendix UK office. With four buttons, users would be able to turn on four different sets of lights on the tree. Every time a light was turned on, Mendix donated money to the Action for Children charity.
How We Delivered the Christmas App
The first thing we needed to decide upon was the scope of the project and the hardware that would be needed. We quickly identified that we would need a webcam for live streaming a view of the tree, as well as a way to control the lights. After a couple of experiments, we settled on the setup described below.
Controlling the Lights
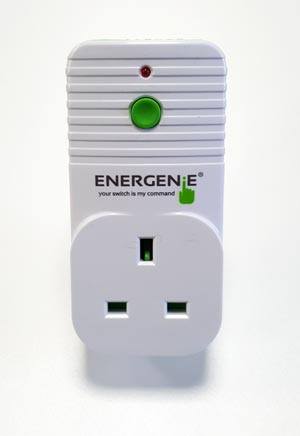
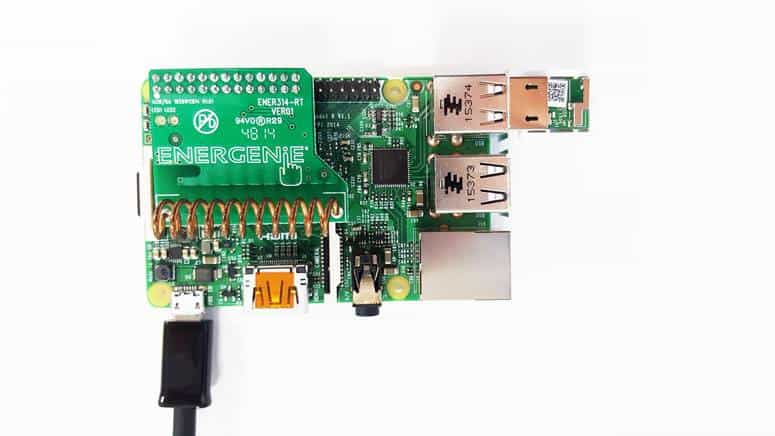
In order to control the lights, I decided to stick with some technology I was already familiar with. As part of a home automation project, I had already built an app to control my home electricity usage. I used a Raspberry Pi in combination with Energenie plugs to control my plug sockets. Energenie has a number of products that help you control your energy and home automation. The Energenie plugs come with a Raspberry Pi control board and Python SDK that allow you to control the plugs.
I wanted a really easy way to turn on and off certain plugs, so I used the Python SDK and wrote my own simple REST web services that allowed me to pass a device ID and an on or off command.
The problem with using this method is that I quickly realized that this service would only be available on our internal network. I would therefore not be able to connect to it from the outside world or to the Mendix Cloud. I didn’t want to change anything in regards to the network security, so I had to think of a way to control the devices without having to do any port forwarding or configurations on the network.
This is when I thought of using MQTT. MQTT is a machine-to-machine (M2M)/Internet of Things connectivity protocol. It is an extremely lightweight protocol that allows devices to publish and subscribe to messages over topics.
Communication via MQTT is usually controlled using an MQTT Broker. Devices can push messages to the broker and applications can listen for those messages by subscribing.
In our Christmas IoT app example, the information I wanted to publish was when a button on the app had been pressed. The information I wanted to subscribe was the light device that needed to be turned on or off. The Raspberry Pi needed to subscribe to the broker, and when a button is pressed it runs the Python web service to turn the lights on or off.
The MQTT Broker that I chose to use was IBM Watson IoT. There are a variety of MQTT brokers out there, including AWS, Mosquitto, Hive MQ and Cloud MQTT. But I chose IBM Watson because of its easy-to-use connectivity with Node Red.
Node Red is an open source visual editor produced by IBM to allow for wiring together Internet of Things. Node Red comes pre-installed with the default Operating System for Raspberry Pi. I wanted to use Node Red because it would allow me to do several things without having to write any code:
- Subscribe to the MQTT topics on IBM IoT for the lights
- Queue messages for turning on the lights
- Automatically turn off the lights after a number of seconds
Below is the Node Red flow that I created using Node Red on the Raspberry Pi. It subscribes to the Watson IoT Gateway and listens to the device topics. When Node Red receives a message on the given topic it will limit these messages to one message per 15 seconds. This ensures that there are no clashes when people click the button at the same time. It will only allow one message pass to the next stage after 15 seconds; other incoming messages will be queued. The Device will then be turned on using the Python web service and a delay of ten seconds will be started. After the delay, the lights will be turned off automatically.
Using an MQTT broker in combination with Node Red allowed us to ensure that we could control the devices externally from the cloud. After making sure our infrastructure was working, we could work on developing the App.
The Mendix App
The app needed to have three core functionalities:
- Allow users to click four buttons to control the lights.
- View the webcam stream.
- View the total amount donated.
We wanted to add some constraints within the app to ensure that a person couldn’t keep clicking the buttons multiple times.
To ensure the buttons were only clicked once, we created a non-persistent entity and stored this against the current user’s session. The entity stored which buttons had been clicked or not. When the button was clicked the app changed the visibility of the button and made it non-clickable. On each click of the button the app would increase the total clicks, work out the total donated, and call IBM IoT with a message to turn on a given light. The Raspberry Pi received this message and then turned on the lights in the office via the web service.
The Video Stream
We wanted an easy way to connect the app to the webcam. After a few experiments with different streaming software and hardware, we decided upon using YouTube, Wirecast (https://www.telestream.net/wirecast/overview.htm), and a Microsoft Webcam. Wirecast software allows you to capture feeds from webcams and stream these to a number of streaming services, including YouTube. YouTube offers unlimited free live streaming and also had the added advantage that its video player runs on HTML 5 rather than flash, unlike other services. Using HTML 5 would ensure that the video stream could run across all devices. We embedded the video into the App using the HTML Snippet in the Mendix App Store.
The Final Product
The final product was launched the week before Christmas and we had a fantastic uptake. At our peak, we had more than 150+ users turning on the lights at the same time. In total, the app helped raise $3,500 for Action for Children. Thanks to all you clickers!

